

Five moves make the biggest difference: pre-chill the cooler for 12 to 24 hours before you load it, layer block ice on the bottom with cubed ice filling every gap, pack a 2:1 ice-to-contents ratio by volume, keep the cooler shaded and off hot pavement, and open the lid as little as possible. Done together, these steps can stretch a cooler’s ice life from a few hours to a full day or more, depending on heat and how often the lid opens. A BANZ picnic cooler bag packed this way holds up well for a family day at the beach or park.
TL;DR:
- Pre-chilling the cooler with ice or cold water for 12 to 24 hours significantly extends ice life and reduces heat transfer from the walls.
- Using a combination of block ice at the bottom and cubed ice on top, with a 2:1 ice-to-contents ratio, maximizes cooling efficiency and ice retention.
- Keeping the cooler in shade, off hot surfaces, and limiting lid openings prevents warm air from accelerating ice melting during the outing.
- Choosing the right ice type is crucial; block ice melts slower, while dry ice provides the longest-lasting cold, but it requires extra precautions.
- Proper lid sealing, organization of contents, and insulation upgrades can improve ice retention without needing a more expensive cooler.
Table of Contents
- How Do You Keep Ice from Melting in a Cooler?
- Why Pre-Chilling and Smart Packing Order Matter Most
- Block Ice, Cubes, Gel Packs, or Dry Ice: What to Use When
- Where You Place the Cooler Changes Everything
- The Habits That Quietly Waste Your Ice
- Why a Family-Sized Cooler Bag Often Beats a Hard Cooler
- Simple Upgrades That Boost a Cooler’s Insulation
- Getting the Lid Seal Right
- Smart Ways to Arrange Items Inside the Cooler
- Which Cooler Materials and Types Hold Ice Longest
- What Most Guides Get Backwards About Cooler Ice
- Get a Cooler Bag That Matches Your Family’s Trip
- Sources
- FAQ
How Do You Keep Ice from Melting in a Cooler?
Work through these steps in order, and don’t skip the prep the night before your trip.
- Pre-chill the cooler. Fill it with ice or cold water 12 to 24 hours ahead so the walls stop pulling heat from your fresh ice.
- Layer block ice on the bottom, cubed ice on top. Block ice melts slower and anchors the cold; cubed ice flows into gaps and chills food fast.
- Pack a 2:1 ice-to-contents ratio. Two parts ice to one part food and drink by volume is the target. When in doubt, add more ice.
- Find shade and a cool surface. A cooler sitting in direct sun on hot asphalt loses ice much faster than one tucked under a tree or awning.
- Limit lid openings. Every open lid dumps out cold air. Keep a separate small cooler for drinks so the main one stays shut.
- Consider dry ice for longer trips. It keeps things frozen far longer than regular ice, but it demands gloves, ventilation, and careful placement away from kids and pets.
Each step reinforces the next. Skip the pre-chill and your ice starts working overtime just to cool the plastic walls before it ever touches your food.
Why Pre-Chilling and Smart Packing Order Matter Most
A cooler’s walls, air pockets, and empty space all soak up cold before your food ever benefits from it. Pre-chilling solves the first problem. Filling it with sacrificial ice or ice water for half a day to a full day lets the insulation reach a low starting temperature, so fresh ice doesn’t waste hours just cooling plastic. One test found a pre-chilled 50-quart cooler retained ice about 30% longer in 85°F weather than one loaded cold, and 15 pounds of sacrificial ice dropped the interior from 75°F down to 38°F before the real packing even started, according to testing on cooler prep.
Packing order matters just as much. Refrigerate or freeze food and drinks the day before, since anything that starts cold acts as extra cold mass rather than something the ice has to work to chill. Layer it like this:
- Block ice on the bottom, since cold air sinks and this keeps the coldest layer where it does the most good.
- Pre-chilled or frozen food items stacked next.
- Cubed ice packed tightly around and between those items to kill air gaps.
- Drinks near the top, since they get pulled out most often.
Fill every remaining space with frozen water bottles or clean towels. Air pockets are one of the fastest ways heat sneaks in, and a tightly packed cooler can outperform a half-empty one by a wide margin.
Pro Tip: Freeze a few plastic water bottles solid and tuck them into any leftover gaps instead of buying extra bags of ice. They double as backup drinking water once they thaw.
Block Ice, Cubes, Gel Packs, or Dry Ice: What to Use When
Not all cold sources behave the same way, and picking the right combination matters more than piling in as much ice as possible.
- Block ice has less surface area exposed to warm air, so it melts far slower than cubes. A 10 pound block can lose roughly half a pound per hour compared to about a pound per hour for the same weight in cubes under similar conditions, according to comparisons of block versus cubed ice. Use it as your longevity base.
- Cubed ice chills items faster and molds into every gap block ice leaves behind. Combine the two rather than choosing one.
- DIY blocks made from frozen milk jugs or 2-liter bottles work as a free substitute for store-bought blocks, though they take up more rigid space and won’t conform to odd-shaped gaps the way loose cubes do.
- Reusable gel packs hold a fixed shape, create less mess than melting ice, and can be refrozen for the next trip. Pair them with a layer of loose ice for faster overall cooling.
- Dry ice keeps a cooler colder for longer than any water-based ice, but it needs real caution. Wear gloves to avoid burns, keep the cooler slightly vented rather than sealed airtight, and store it well out of reach of children and pets.
A hybrid approach, anchoring with a block or two and filling around it with cubes or frozen bottles, tends to outperform relying on any single ice type alone.
Where You Place the Cooler Changes Everything
Shade alone can roughly cut the melt rate in half compared to a cooler sitting in direct sun, based on field comparisons of shaded versus sun-exposed coolers. That single decision, where you set the cooler down, often matters as much as what you packed inside it.
- Set the cooler on grass, wood, or a folded tarp rather than concrete, asphalt, or bare metal, which radiate stored heat straight into the cooler’s base.
- Drape a light-colored towel, a reflective emergency blanket, or a layer of bubble wrap over the top to bounce off radiant heat.
- If you’re hauling the cooler in a truck bed, raise it off the metal surface with a board or thick mat.
- Angle the cooler so a wall or umbrella blocks the afternoon sun, which tends to be more intense than morning light.
None of this requires new gear, just a few minutes of thought about where the cooler sits once you arrive.
The Habits That Quietly Waste Your Ice
How you use the cooler throughout the day matters as much as how you packed it. Every lid opening lets warm air rush in and cold air spill out, so plan ahead and grab several items at once instead of digging around repeatedly.
- Organize contents by how often you’ll need them, with frequently grabbed snacks and drinks near the top.
- Pack a second, smaller cooler just for drinks if your group opens the main cooler constantly. It saves your food cooler from taking the hit every time someone wants a soda.
- Assign one person to handle the lid so it isn’t opening every few minutes out of habit.
- Leave meltwater where it is unless you’re restocking supplies or breaking camp. Cold water actually holds temperature better than the air that replaces it when you drain, so pouring it out early usually speeds up melting rather than preventing a mess.
Pro Tip: Keep a checklist taped to the inside of the lid listing what’s inside and where, so nobody has to root around looking for the mustard.
Why a Family-Sized Cooler Bag Often Beats a Hard Cooler
A soft-sided insulated cooler bag hits the sweet spot for most family outings. It’s lighter to carry, easier to pre-chill since there’s less material for the cold to work through, and it fits neatly into a trunk or under a stroller in a way a bulky hard cooler never does. There is a useful breakdown of the tradeoffs between cooler bags and hard coolers worth reading if you’re deciding between the two.
Match the bag size to the outing:
- For a quick trip to the playground or a packed lunch on the go, the BANZ lunch cooler bag holds enough ice and food for one or two people without the bulk of a full-size cooler.
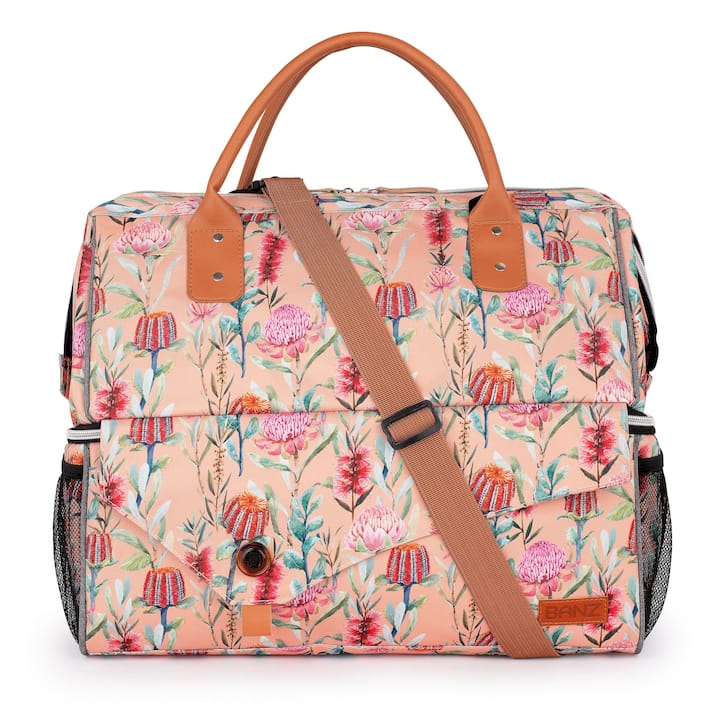
- For a family beach day, picnic, or afternoon at the park, the BANZ picnic cooler bag gives you the room for the 2:1 ice-to-food ratio this guide recommends while still being easy for one parent to carry.
Both follow the same rules covered above: pre-chill it, pack tight, and keep the lid shut as much as you can.
Simple Upgrades That Boost a Cooler’s Insulation
Most coolers can hold cold better than they do out of the box, and a few low-cost additions close the gap. Reflective bubble insulation, sold in rolls at hardware stores, can be cut to size and taped along the interior walls and lid of a hard cooler to add a radiant barrier that regular plastic walls don’t have on their own. Rigid foam board, the kind used for home insulation projects, works the same way when cut to fit the cooler’s interior dimensions and slipped in as a liner.
For soft-sided cooler bags, the insulation is usually built into the walls already, which is part of why pre-chilling a bag like the BANZ picnic cooler bag takes less time than pre-chilling a large hard cooler with thick plastic walls.
A cheap and often overlooked trick: line the bottom and sides with a folded moving blanket or a thick beach towel before adding ice. It adds a buffer layer between the ice and the cooler’s outer shell, which matters most on coolers that are older or lower quality, since seals and wall thickness degrade over years of use and sun exposure.
Reflective exterior wraps do double duty. A cover that reflects sunlight away from the outside also slows the rate heat transfers through the walls into the ice inside, working alongside the shade placement covered earlier in this guide rather than replacing it. None of these upgrades matter much, though, if the lid isn’t sealing properly, which is the next thing to check.
Getting the Lid Seal Right
A cooler that isn’t sealing tightly loses cold air no matter how well you packed it. Check the gasket or rubber seal around the lid’s edge for cracks, warping, or debris caught in the seam. Food residue or sand from a previous trip can prop the lid open just enough to let warm air seep in without anyone noticing.
Press down on the lid at each corner before closing the latches. If one side lifts more easily than another, the hinges or latch mechanism may be misaligned, which is common on older coolers that have been dropped or overloaded. On hinged lids, make sure both latches click fully rather than just one, since a lid held shut by a single latch tends to flex open slightly at the opposite corner.
For soft-sided cooler bags, the zipper is the equivalent of the seal. Pack contents so nothing bulges against the zipper track, since a stretched zipper won’t close all the way and creates a steady leak point for cold air. Double check that any Velcro flap or drawstring closure layered over the zipper is fully secured too, since many cooler bags use that as a second barrier specifically to compensate for a zipper’s limits compared to a hard cooler’s latch.
Smart Ways to Arrange Items Inside the Cooler
The order you pack things in isn’t just about layering ice and food. It’s about controlling how cold moves through the whole space. Dense, cold items belong at the bottom near the block ice, since cold air sinks and settles there naturally.
- Put items you won’t need until later at the bottom, since they’ll be disturbed the least.
- Keep raw meat and anything requiring the coldest temperatures directly against or below the ice layer, never floating near the top.
- Save one corner or the top layer for items you’ll grab often, like drinks or snacks, so digging for them doesn’t disturb the colder layers underneath.
- Avoid leaving large gaps between items. Every empty pocket of air is space that warms up faster than ice or food would.
- If you’re using a divider or a smaller container inside the main cooler, use it to separate wet items like drinks from things that shouldn’t get soggy, such as bread or chips.
This arrangement matters more on longer trips, when you’ll be opening and closing the cooler dozens of times and want the parts you touch least to stay coldest longest.
Which Cooler Materials and Types Hold Ice Longest
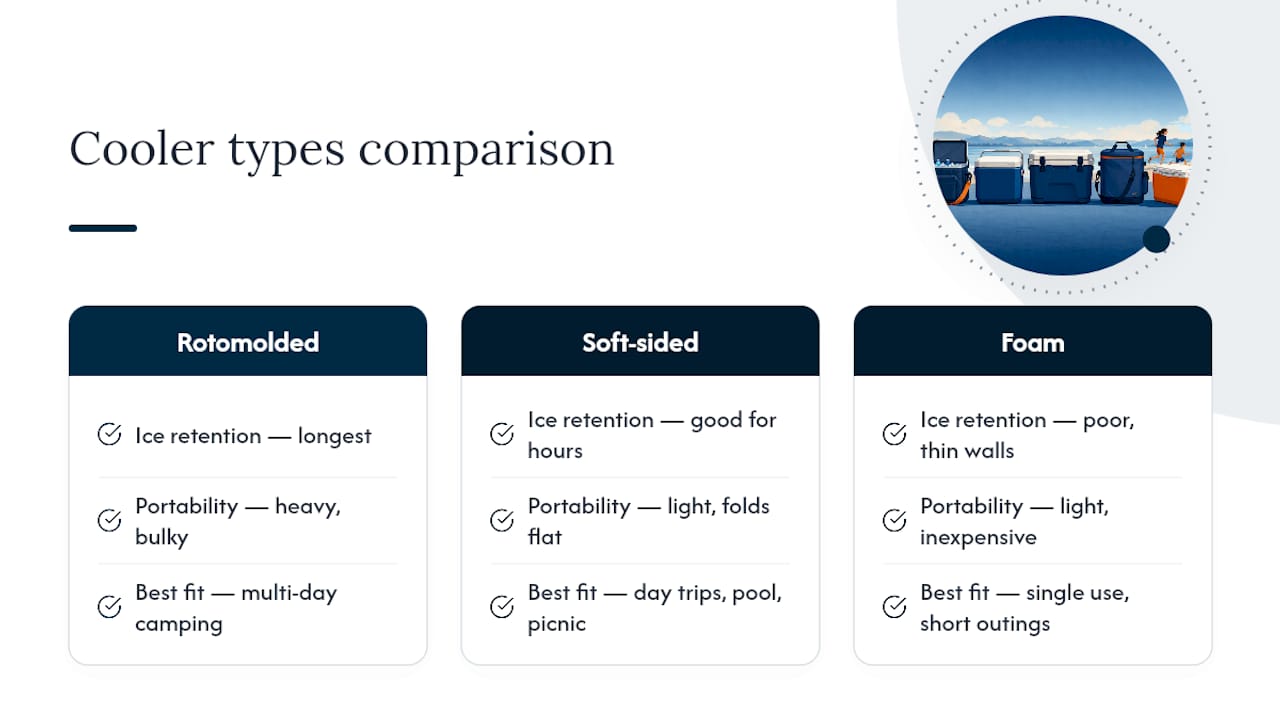
Rotomolded hard coolers, the thick-walled kind with a single continuous plastic shell, tend to hold ice the longest of any consumer cooler type because their walls are dense and their seals are built tight. They’re also heavy, bulky, and overkill for most family outings that last a single afternoon rather than a multi-day camping trip.
Insulated soft-sided cooler bags, by contrast, trade some raw ice-holding time for practicality. They’re lighter, fold flat when empty, and are far easier for one parent to carry alongside kids, snacks, and beach gear. For most family trips under a day, that tradeoff works in your favor, since you’re not trying to keep ice solid for 4 days in 95°F heat, you’re trying to keep drinks cold for a few hours at the park.
Foam coolers sit at the bottom of the retention scale. They’re inexpensive and fine for a single use, but their thin walls and loose lids let heat in fast, so they’re a poor fit if ice retention actually matters to your day.
The material matters less than matching the cooler to the trip. A rotomolded cooler is the right call for a weekend camping trip. A well-packed insulated bag, following the checklist and 2:1 ratio covered earlier, is usually the smarter, lighter choice for a few hours at the pool or a picnic in the park.
What Most Guides Get Backwards About Cooler Ice
Most advice on this topic treats ice retention as a gear problem: buy a thicker cooler, buy more ice, buy a fancier gel pack. The research tells a different story. Pre-chilling and packing discipline matter more than the cooler’s price tag. A $30 insulated bag that’s been pre-chilled, packed tight at a 2:1 ratio, and kept in the shade will often outlast an expensive hard cooler that got loaded straight from the garage with warm food and left in direct sun.
The other place conventional wisdom fails parents specifically: it assumes you’re packing for a multi-day trip. Most family outings last four to eight hours, not four days. That changes the math. You don’t need a 65-quart rotomolded beast that weighs 30 pounds empty. You need something sized to your actual load that you can pre-chill in your fridge overnight and carry one-handed while also managing a toddler.
If there’s one habit worth fixing first, it’s the lid. Families open coolers constantly out of casual curiosity, and that single behavior undoes half the packing effort described above. Fix that one thing before you buy anything new.
— Shari M. Murphy
Get a Cooler Bag That Matches Your Family’s Trip
Buying a bigger cooler doesn’t fix a packing problem. Some brands make insulated cooler bags sized for how families actually spend a day outdoors, not how outfitters pack for a week in the backcountry. This means the cooler bags can be light enough to carry with kids in tow, easy to pre-chill the night before, and roomy enough to follow the 2:1 ice-to-contents ratio this guide recommends.
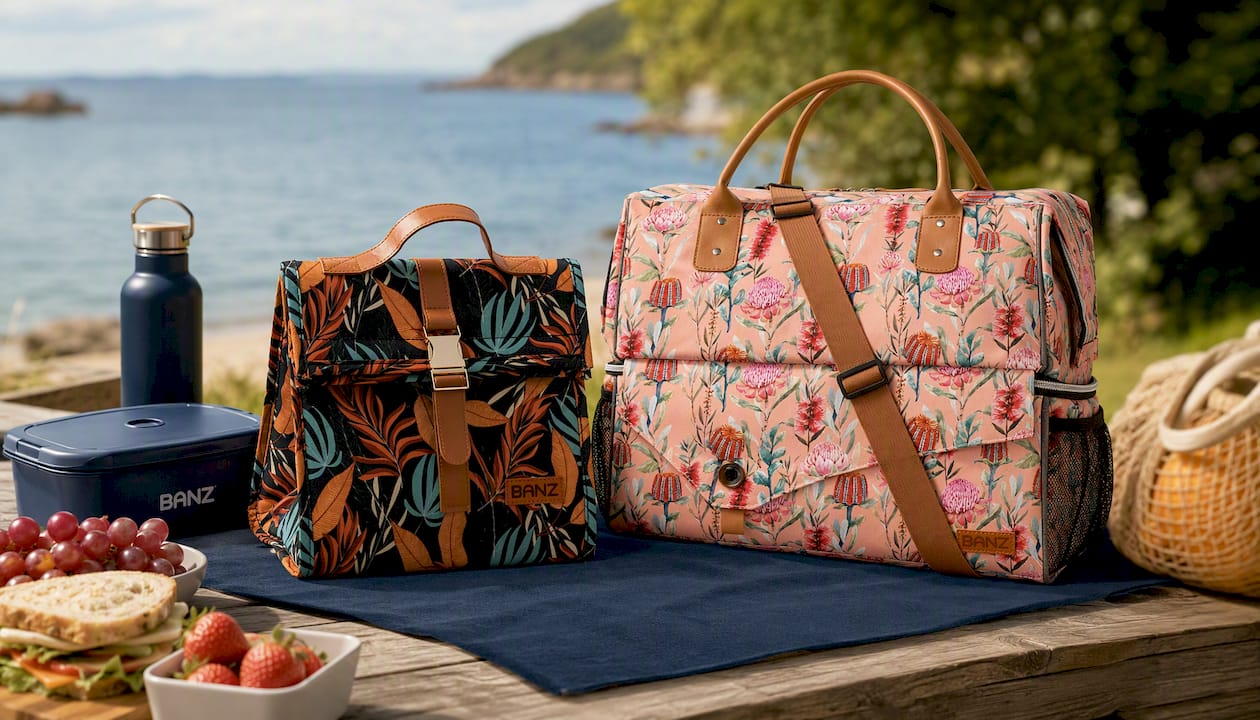
For a quick outing, a packed lunch, or a trip to the splash pad, the BANZ lunch cooler bag holds enough ice and food for a couple of people without the bulk of a full cooler. For a bigger family day at the beach or a picnic with extended family, the BANZ picnic cooler bag gives you the room to pack block ice, cubed fill, and drinks the right way. Pick the size that matches your load, follow the checklist above, and check out both options along with the rest of the family outdoor gear BANZ carries for your next outing.
Sources
The packing rules in this guide come from field testing and practical experience with ice retention:
- How to Pack a Cooler for Maximum Ice Retention?
- How to keep ice longer while camping | Kit Authority
- How to Keep Ice From Melting So Quickly in Your Cooler
FAQ
What Can I Cover a Cooler With So It Doesn’t Melt as Fast?
A light-colored towel, a reflective emergency blanket, or a layer of bubble wrap all work well laid over the top and sides. These covers bounce radiant heat away from the cooler’s exterior, and combined with shade placement, they can meaningfully slow how fast the ice inside disappears.
What Keeps Ice from Melting the Longest?
Block ice paired with a pre-chilled cooler and shaded placement keeps ice solid the longest, since block ice has less surface area exposed to warm air than cubes. A pre-chilled 50-quart cooler retained ice about 30% longer in 85°F weather compared to one packed cold straight from the store.
Does Aluminum Foil Keep Ice from Melting?
Aluminum foil reflects some radiant heat, but it isn’t a reliable insulator on its own since it conducts heat quickly once warmed. A reflective emergency blanket or dedicated cooler cover does a better job for the same effort.
How Long Can Ice Stay in a Cooler Before Melting?
It depends heavily on the cooler quality, ice ratio, and conditions, but a well-packed cooler following a 2:1 ice-to-contents ratio, pre-chilled and kept shaded, commonly holds ice through a full day outing and often into the next. A rotomolded hard cooler packed the same way can stretch that to several days, while a loosely packed cooler left in the sun may lose most of its ice within a few hours.